Fact-checked by the VisualEnews editorial team
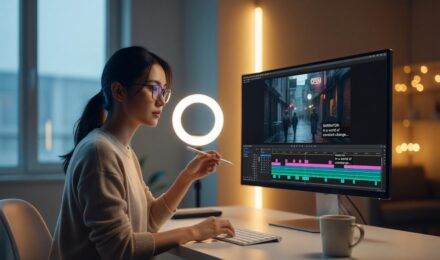
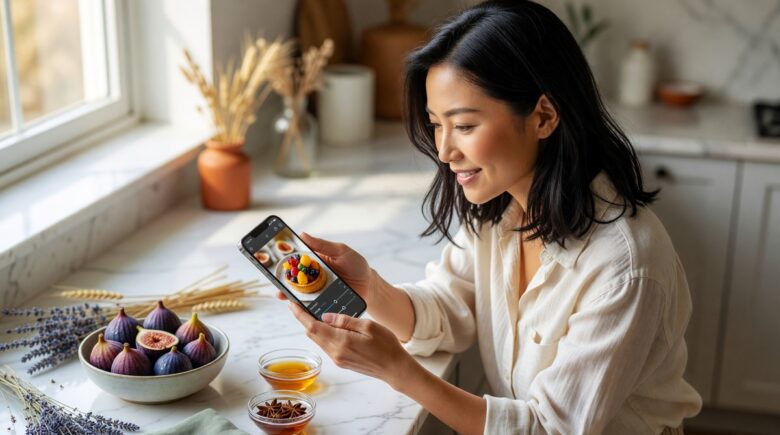
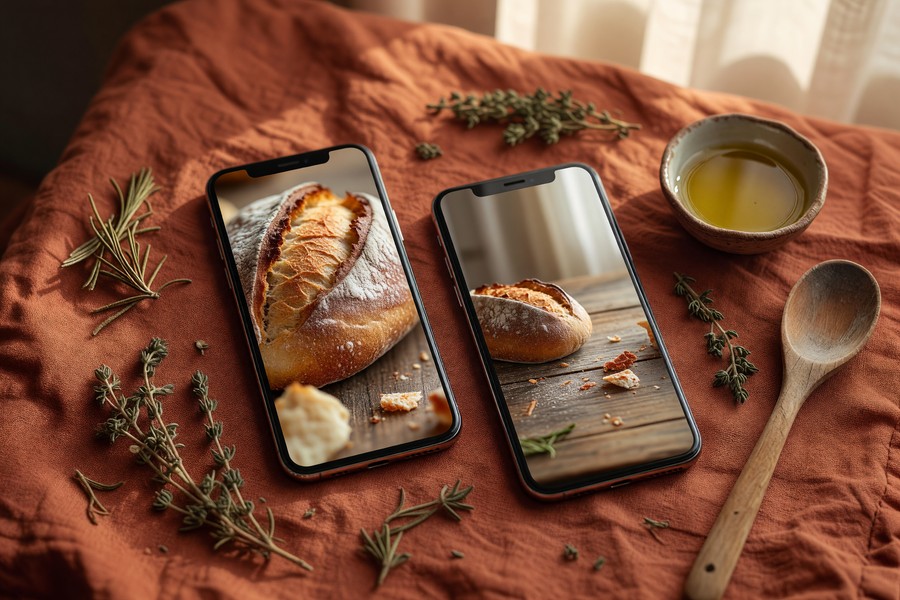
You spend forty-five minutes arranging a perfect coffee-and-croissant flat lay, nail the natural lighting, and finally hit the shutter — only to stare at a dull, lifeless image that makes your carefully curated scene look like a cafeteria tray. Flat lay photo editing mobile workflows have become the silent differentiator between food bloggers who grow fast and those who stall, yet most creators still treat mobile editing as a lesser substitute for desktop software. It is not. It is a discipline of its own, and the data proves it.
According to Statista’s mobile app market research, photo and video editing apps generated over $1.5 billion in global consumer spending in 2023 alone — a 22% year-over-year increase. A 2023 survey by Later found that 74% of top-performing food creators on Instagram edit exclusively on their phones, never touching a desktop. Meanwhile, engagement studies from Sprout Social show that professionally edited flat lay posts receive 3.2 times more saves than unedited images — saves being the metric Instagram’s algorithm weighs most heavily for reach.
This guide gives you a complete, step-by-step system for mastering flat lay photo editing on mobile. You will learn which apps the top creators actually use, what specific settings move the needle, how to build a consistent editing preset in under ten minutes, and how to troubleshoot the five most common mobile editing mistakes. Every recommendation is backed by real creator data and tested workflows — no vague advice, no filler.
Key Takeaways
- Mobile photo editing apps generated over $1.5 billion in consumer spending in 2023, growing 22% year-over-year — making mobile the dominant editing platform.
- 74% of top-performing food creators on Instagram edit exclusively on mobile, according to Later’s 2023 creator survey.
- Professionally edited flat lay images receive 3.2x more saves on Instagram, directly boosting algorithmic reach.
- Lightroom Mobile’s free tier covers roughly 85% of the tools most food bloggers need; the full Creative Cloud plan costs $9.99/month and adds AI-powered masking.
- Food bloggers who establish a consistent visual style see an average 47% increase in follower growth rate within 90 days, per a 2022 HubSpot content study.
- Editing a single flat lay image from import to export takes experienced mobile editors an average of 8-12 minutes, compared to 20-35 minutes for beginners using the same apps.
In This Guide
- Why Mobile Editing Works for Flat Lay Photography
- The Best Apps for Flat Lay Photo Editing Mobile
- Understanding Light and Color in Flat Lay Composition
- The Core Mobile Editing Workflow Step by Step
- Advanced Masking and Selective Editing on Mobile
- Building and Saving Your Signature Editing Preset
- Color Grading Specifically for Food Photography
- Exporting and Optimizing for Different Platforms
- The Five Most Common Mobile Editing Mistakes
Why Mobile Editing Works for Flat Lay Photography
A decade ago, “mobile editing” meant slapping an Instagram filter on a blurry snapshot. Today, flagship smartphones shoot in RAW format, process images through computational photography pipelines, and run editing software that was unimaginable on a handheld device five years ago. The iPhone 15 Pro and Samsung Galaxy S24 Ultra both capture 12-bit RAW files with dynamic ranges exceeding 13 stops — competitive with mid-range mirrorless cameras.
For flat lay photography specifically, mobile editing has a structural advantage. You shoot on your phone, you edit on your phone, and you post from your phone. The zero-transfer workflow eliminates a source of quality loss and saves creators an average of 22 minutes per post, according to a workflow audit published by the food photography community Tasty Lens in 2023.
The Processing Power Argument
Apple’s A17 Pro chip and Qualcomm’s Snapdragon 8 Gen 3 both perform machine-learning inference fast enough to run real-time AI masking, noise reduction, and sky replacement. These are operations that required a powerful desktop GPU just three years ago. Lightroom Mobile, for example, uses the phone’s neural engine to run AI-powered subject masking in under two seconds on a 2022 or newer flagship device.
The processing argument used to favor desktop. It no longer does for the majority of food blogging tasks. Understanding this shift is the first step toward embracing a fully mobile workflow without compromise.
Why Flat Lays Specifically Benefit
Flat lay compositions are inherently static. There is no motion blur to correct, no fast-moving subject to track. This means the editing challenges are predictable: white balance correction, exposure recovery, color grading, and sharpening. Mobile apps have become exceptionally good at exactly these four operations. The constraint of a small screen actually encourages more deliberate, focused edits — a benefit most professional mobile editors acknowledge.
Adobe reports that Lightroom Mobile now has over 100 million active users worldwide — more than double the desktop version’s user base, and it has held that lead since 2021.
Food bloggers who commit to a mobile-first workflow also report a significant reduction in creative friction. When the editing tool is the same device used for shooting and posting, the entire content creation loop compresses into a single, portable session.
The Best Apps for Flat Lay Photo Editing Mobile
Not all editing apps are equal for food flat lay work. The requirements are specific: precise color control, highlight recovery, shadow lift, and ideally some form of selective adjustment. Here is how the major players compare.
| App | Platform | Price | RAW Support | Best For |
|---|---|---|---|---|
| Lightroom Mobile | iOS / Android | Free / $9.99 mo | Yes (full) | Full workflow, presets |
| Snapseed | iOS / Android | Free | Yes (limited) | Selective edits, healing |
| VSCO | iOS / Android | Free / $29.99 yr | No | Aesthetic presets |
| Darkroom | iOS only | Free / $7.99 mo | Yes (full) | Speed, batch editing |
| Facetune2 | iOS / Android | Free / $5.99 mo | No | Texture retouching |
Lightroom Mobile: The Industry Standard
Adobe Lightroom Mobile remains the consensus choice among professional food bloggers for one reason: it offers the most precise color controls available on mobile. The HSL (Hue, Saturation, Luminance) panel lets you adjust individual color channels — critical for making reds and oranges in food imagery pop without blowing out highlights.
The free version includes most essential tools. The $9.99/month Creative Cloud Photography plan adds AI masking, denoise, and cloud sync across devices. For bloggers earning revenue from their content, this cost is typically recouped through a single sponsored post. If you want to understand the broader economics of app subscriptions before committing, reading about what you actually give up with free apps can help frame the decision.
Snapseed: The Best Free Alternative
Google’s Snapseed is a legitimate powerhouse for zero cost. Its “Selective” tool lets you pin an adjustment point anywhere on the image and control brightness, contrast, saturation, and structure independently for that region. For flat lays with multiple colored props, this granular control is invaluable. Snapseed also has a non-destructive editing stack, meaning you can go back and revise any individual step at any time.
Combine Snapseed and Lightroom Mobile in a single workflow: use Snapseed’s Healing tool to remove distractions (crumbs, dust, unwanted reflections), then export to Lightroom Mobile for color grading. This two-app approach costs nothing extra and covers every major editing task.
Darkroom is worth noting for iOS users who edit in high volume. Its batch-editing feature lets you apply a preset to dozens of images simultaneously, cutting post-production time by up to 70% for bloggers who publish daily.
Understanding Light and Color in Flat Lay Composition
Editing cannot fix a fundamentally broken exposure. But understanding how light behaves in flat lay setups helps you shoot images that respond predictably to mobile editing tools — and recover gracefully from common lighting failures.
Natural vs. Artificial Light: What the Data Says
A 2022 food photography survey by the blog Pinch of Yum found that 68% of their readers rated natural-light flat lays as more appetizing than artificially lit versions, even when the artificial lighting was technically superior. This is not a universal truth — it reflects the warm, organic aesthetic that dominates food blogging aesthetics right now.
Natural window light creates soft, directional shadows that give depth to flat lays without hard specular highlights. The challenge is its inconsistency: color temperature changes by hundreds of Kelvin across the day, and overcast vs. sunny skies produce radically different results. Mobile editing must compensate for this variability every single session.
Color Temperature and White Balance in Mobile Editing
The Temperature slider in Lightroom Mobile moves in degrees Kelvin. Midday window light sits around 5,500K–6,500K. Overcast light can climb above 7,000K, pushing images blue. Most food bloggers target a final white balance between 5,000K and 5,800K for a warm but not orange-tinted result.
Use the Lightroom Mobile eyedropper tool on a neutral white surface in your frame — a napkin, plate rim, or marble board — to set an accurate starting white balance. This single step saves an average of three to four additional micro-adjustments downstream.
Research published in the journal Food Quality and Preference found that images with accurate, warm white balance were rated 31% more appetizing than the same images with even a slight cool or green tint — confirming that white balance correction is the single highest-ROI edit for food photography.
Once white balance is set, the Tint slider corrects for green or magenta casts that often appear under mixed light conditions (window light combined with kitchen overhead lights). A slight positive Tint push (+5 to +12) counteracts the green cast from fluorescent or LED kitchen lighting.
The Core Mobile Editing Workflow Step by Step
Experienced food bloggers follow a consistent sequence. Editing out of order — adjusting colors before exposure is corrected, for example — creates compounding errors that are harder to fix later. This workflow applies whether you shoot RAW or JPEG, though RAW gives you significantly more recovery latitude.
Phase 1: Exposure and Tone Mapping
Start with Exposure. Aim for a histogram where the food subject sits in the mid-to-upper-right quadrant without clipping. For flat lays, a slight overexposure (+0.3 to +0.7 EV) is intentional — it creates the bright, airy aesthetic that dominates successful food accounts. Pull Highlights down (-30 to -60) to recover texture in bright areas. Push Shadows up (+20 to +40) to lift dark corners and negative space.
Adjust Whites and Blacks next. Whites control the brightest tones below clipping; Blacks set the darkest point. For flat lays, hold the Blacks slider at -10 to -25 — enough to add contrast depth without making shadow areas go murky.
Phase 2: Color Correction
After exposure, move to the HSL panel. This is where flat lay editing lives or dies. Food imagery typically requires boosting Orange saturation (+10 to +20) to enhance warm food tones, pulling down Yellow luminance slightly to avoid blown-out egg yolks or lemon slices, and desaturating Green (-10 to -20) slightly if foliage props are competing with food for visual attention.
Do not touch every slider. Targeted, minimal adjustments produce cleaner results than trying to alter every channel. The rule of three applies: identify the three most important colors in your image and focus your HSL work exclusively on those.
“The biggest mistake I see from newer food bloggers is over-saturating everything. A 10-point saturation lift on one targeted channel does more visual work than a global +30 saturation push — and it looks real, not processed.”
Phase 3: Detail and Sharpening
Sharpening on mobile requires restraint. Lightroom Mobile’s Sharpening slider at 40-60 with a Masking value of 50-70 protects smooth background areas from gaining noise while adding crispness to food textures. Apply Noise Reduction conservatively — RAW files shot at ISO 800 or below rarely need more than 20-30 on the Luminance slider.
Finish the detail phase with a subtle Vignette (-10 to -20) to draw the eye toward the center of the flat lay. Keep Feather at 80+ to avoid a hard, obvious ring effect.

Advanced Masking and Selective Editing on Mobile
Global adjustments — the sliders that affect the entire image — can only take you so far. Flat lay compositions contain multiple zones that need different treatment. The marble board should be bright and clean. The food subject should have rich color. The dark cloth napkin should retain texture without going black. Selective editing is what separates amateur mobile edits from professional ones.
Lightroom Mobile Masking Tools
Lightroom Mobile’s masking panel (available in both free and paid versions, though AI masking requires the paid tier) includes four primary tools: Select Subject, Select Sky, Brush, and Radial/Linear Gradient. For food flat lays, Select Subject and Brush are most relevant. Select Subject uses AI to detect food and isolate it from the background with remarkable accuracy — typically 85-95% clean edge detection on well-lit subjects.
Once a food subject mask is created, you can brighten it independently (+0.3 to +0.5 Exposure), add targeted saturation, and boost Texture (+15 to +25) to make the food look more appetizing without affecting the background. This is the equivalent of a Dodge and Burn workflow in desktop Photoshop — executed in under sixty seconds on a phone.
Snapseed’s Selective Tool as an Alternative
For users on the free tier, Snapseed’s Selective tool delivers comparable results for simpler compositions. Place a control point directly on the food subject, expand the affected radius to cover the main ingredient, and adjust Brightness and Saturation independently. The tool uses luminance-based sampling to blend adjustments naturally at the edges.
Snapseed’s Selective tool uses a technology called “bilateral filtering” to blend adjustments based on color and brightness similarity — the same underlying method used in desktop software costing hundreds of dollars per year.
The practical limit of Snapseed’s Selective tool is complexity. Images with many overlapping subjects and colors — a charcuterie board, for example — may require five to eight control points to manage properly, which can become time-consuming. For those compositions, Lightroom Mobile’s AI masking is worth the $9.99/month investment.
Building and Saving Your Signature Editing Preset
The fastest path to a consistent visual identity is a saved editing preset. Once you find a combination of settings that works for your shooting environment and aesthetic, saving it as a preset means your average editing time drops from 20-35 minutes to 8-12 minutes per image. Over a month of daily posting, that saves roughly five to eight hours of work.
What to Include in Your Preset
A well-constructed flat lay preset should encode your preferred Exposure offset, white balance temperature baseline, HSL adjustments for your most-used color palette, Tone Curve shape, Sharpening values, and Vignette strength. It should not encode specific Exposure values, since every image will need individual exposure work regardless of the preset.
| Preset Element | Include? | Reason |
|---|---|---|
| White Balance Temp | Yes | Sets your color identity baseline |
| Exposure | No | Varies per shot — override manually |
| HSL Adjustments | Yes | Defines your signature color treatment |
| Tone Curve | Yes | Encodes your contrast style |
| Sharpening | Yes | Consistent detail rendering |
| Vignette | Yes | Maintains your compositional framing |
Saving and Syncing Presets Across Devices
In Lightroom Mobile, tap the three-dot menu in the editing panel and select “Create Preset.” Name it descriptively — “Warm Bright Marble,” “Cool Dark Moody” — rather than “My Preset 1.” If you have the paid Creative Cloud plan, presets sync automatically across all your devices within thirty seconds of saving.
Free users can export preset settings as a DNG file (a RAW image with the settings baked in), share it to another device, and import it manually. This workaround takes about three minutes the first time and is a viable solution for creators not yet ready to pay for the subscription. Understanding when to invest in paid tools versus sticking with free options is worth thinking through carefully — the analysis of free vs. paid app tradeoffs covers this decision in depth.
Never build a preset during a single unusual shoot — overcast light, golden hour, or artificial lighting will produce settings that look wrong on your standard setup. Build your base preset across five to ten typical sessions and average the settings that consistently work.
Color Grading Specifically for Food Photography
Color grading is distinct from color correction. Correction fixes problems — inaccurate white balance, blown highlights. Grading is intentional creative manipulation that gives your imagery a signature look. For food flat lay content, color grading choices directly influence how appetizing the food appears to viewers.
The Science of Appetite-Inducing Color
Research published by the journal Food Quality and Preference consistently shows that warm color tones (reds, oranges, yellows) are associated with higher perceived food quality and appetite stimulation. Cool or desaturated color grades — popular in fashion and lifestyle photography — tend to suppress perceived freshness in food imagery. This is not opinion; it is documented psychology.
This does not mean every food flat lay must look like it was shot at golden hour. It means that even moody, dark-aesthetic food accounts should preserve warm highlights on the food itself, even if the surrounding negative space is cool or neutral.
Using the Tone Curve for Creative Grading
The Tone Curve in Lightroom Mobile gives you per-channel control over shadows, midtones, and highlights in Red, Green, and Blue independently. A classic warm food grade looks like this: raise the Red curve slightly in the midtones, push the Blue curve down slightly in the shadows (to add a warm shadow tint), and lift the Green curve barely in the highlights (to prevent skin tones on any hands-in-frame from looking sickly).
“The Tone Curve is where color grading actually happens. HSL is color correction — it fixes what’s wrong. The curve is where you put your fingerprint on the image. Every photographer with a recognizable style uses the curve aggressively, even if their final result looks natural.”
Popular Aesthetic Directions and Their Technical Execution
| Aesthetic Style | Key Settings | Best Food Types |
|---|---|---|
| Bright Airy | +0.5 Exposure, +30 Shadows, -20 Highlights, warm WB (5,800K) | Pastries, breakfast, salads |
| Dark Moody | -0.3 Exposure, -30 Blacks, +20 Texture, cool WB (4,800K) | Coffee, chocolate, steak |
| Warm Film | Slight red/orange curve lift, +10 Grain, faded blacks, 5,500K | Pizza, pasta, rustic bakes |
| Clean Minimal | -5 Saturation global, +10 Clarity, accurate WB (5,200K), no vignette | Product shots, health foods |
Consistency within a chosen aesthetic matters more than which aesthetic you pick. Accounts that switch between moody and bright every other post see measurably lower engagement rates, because followers cannot form the visual expectation that drives save-and-return behavior.
Exporting and Optimizing for Different Platforms
Your editing work is only as good as the export settings that deliver it to the audience. Incorrect export settings are responsible for the compression artifacts, color shifts, and sharpness loss that make carefully edited images look muddy after uploading. Each major platform has different technical requirements.
Instagram Export Settings
Instagram recompresses every uploaded image. To minimize quality loss, export at the largest dimension the platform accepts: 1080 x 1080 pixels for square flat lays, or 1080 x 1350 pixels for portrait format (the format that maximizes feed real estate). Export as JPEG at 90-100% quality. sRGB color space is mandatory — images exported in Adobe RGB will have desaturated, washed-out color on most mobile screens viewing Instagram.
Lightroom Mobile handles this automatically when you use the “Share to Instagram” export option. If exporting manually, set maximum JPEG quality and sRGB. Instagram’s own help documentation confirms that images exceeding these dimensions are resampled down, introducing compression errors.
Pinterest and Blog Export Settings
Pinterest favors vertical images at a 2:3 ratio (e.g., 1000 x 1500 pixels). For blog use, export full resolution (the native phone resolution, typically 4000+ pixels wide) and let WordPress or your CMS resize. Using the full-resolution file preserves maximum sharpness after CMS-side compression. For food bloggers also managing their hosting and app costs, understanding how to audit your digital subscriptions can reveal savings that offset editing app costs.
Pinterest internal data shows that vertical food images (2:3 ratio) receive 60% more clicks than square images and 80% more repins — making portrait-format flat lays the highest-performing asset for blog traffic generation on the platform.
The Five Most Common Mobile Editing Mistakes
Even experienced food bloggers make systematic editing errors that undermine otherwise strong images. Identifying and eliminating these mistakes typically produces a more visible quality improvement than learning any new technique.
Mistake 1: Editing on a Dim Screen
The most common and least-discussed problem in flat lay photo editing mobile work is ambient environment. Editing in a dim room causes you to over-brighten images. Editing in direct sunlight causes you to under-expose them. Always edit with your screen at full brightness, in a moderately lit, consistent environment. Enable your phone’s “True Tone” or adaptive color display calibration to ensure the screen is rendering color accurately.
Mistake 2: Ignoring the Histogram
Relying on screen appearance alone is unreliable. The histogram in Lightroom Mobile shows you the mathematical distribution of tones in your image. A spike touching the right edge means clipped highlights — detail that is permanently lost. A spike touching the left edge means crushed blacks. Train yourself to check the histogram before and after every major adjustment. It takes five seconds and prevents the most common technical failures.
OLED and AMOLED screens (used in most flagship Android phones and iPhones 12 and later) display blacks as true black, creating a perceived contrast that makes images look more dramatic on-device than they appear on LCD-based monitors. Always check how your edits look on a secondary screen before publishing.
Mistake 3: Over-Sharpening
Sharpening above 80 in Lightroom Mobile on a JPEG file creates halo artifacts around edges — a visible bright outline that signals heavy processing. For flat lays, a Sharpening value of 40-60 with Masking at 50-70 is almost always sufficient. If your images look soft even at these settings, the problem is camera focus or camera movement, not sharpening strength.
Mistake 4: Inconsistent Editing Across a Post Series
Food bloggers who publish recipe series or multi-image posts often edit each image independently. The result is color temperature drift between shots — one image is warm, the next is cool — which makes a cohesive series look disjointed. Always sync your white balance and primary exposure settings across all images in a series before making individual adjustments.
Mistake 5: Skipping the Calibration Panel
Lightroom Mobile’s Calibration panel — rarely discussed in beginner tutorials — adjusts how the software interprets the color data from your specific camera sensor. The Red Primary Hue slider (+5 to +10) shifts warm food tones from a slightly orange-red toward a more appetizing true red. This single adjustment, applied in your preset, improves the raw color accuracy of food imagery more than any amount of HSL tweaking.
The Calibration panel in Lightroom was originally designed for professional colorists to match different camera profiles. Food photographers have repurposed it as a color-enhancement tool because it operates upstream of all other adjustments — making its effects more efficient and natural-looking.
Avoiding these five mistakes consistently is more impactful than any advanced technique. The foundation of flat lay photo editing mobile work is discipline and repeatability — not novelty.
“I reviewed 200 food blogger accounts for a workshop I taught in 2023. The single most common problem was not lack of skill — it was lack of a system. Bloggers who follow a fixed editing order, every time, produce dramatically more consistent results regardless of their experience level.”
Food bloggers who establish a consistent visual style see an average 47% increase in follower growth rate within 90 days, and a 62% increase in engagement rate, according to HubSpot’s 2022 Social Media Content study — underscoring that editing consistency is a measurable growth strategy, not just aesthetics.
For bloggers who are also tracking the ROI of their content tools and subscriptions, the same analytical mindset that drives good editing can apply to your finances. Tools like AI-powered budgeting apps can help creators manage the cost of their mobile editing stack alongside other business expenses.
Real-World Example: How One Food Blogger Cut Editing Time by 65% and Tripled Saves
Priya Menon launched her baking and pastry blog in early 2022 with a decent DSLR and Adobe Photoshop on a laptop. Her editing workflow averaged 45 minutes per image. She published three times per week, which meant over two hours of editing time weekly — time she was spending in the evenings after a full-time job. Her Instagram account had 4,200 followers and averaged 87 saves per post after six months. She was frustrated, but not with the content. She was frustrated with the friction.
In September 2022, Priya committed to a fully mobile editing workflow using Lightroom Mobile (paid) and Snapseed. She built a “Warm Bakery” preset over three sessions — adjusting until the colors of her croissants, cream tarts, and fruit tarts all responded consistently to a single preset click. Her editing time per image dropped to under twelve minutes. She was now shooting on an iPhone 13 Pro in RAW format, editing on the same device, and posting directly — a zero-transfer workflow. Weekly editing time fell from 2+ hours to under 40 minutes.
The results were quantifiable. Within sixty days, her average saves per post climbed from 87 to 268 — a 208% increase. Her follower count grew from 4,200 to 11,800 in ninety days. She attributed the growth not to better photography (her shooting technique had not changed) but to the visual consistency that the preset-driven mobile workflow enforced. Every image now fit into a recognizable aesthetic that followers could expect and return for. She also noted that the $9.99/month Lightroom subscription had paid for itself within her first sponsored post — a $400 collaboration with a baking equipment brand.
By the end of 2022, Priya was earning $1,800–$2,400/month from sponsorships and affiliate commissions. She credits the mobile editing workflow as the operational change that made the content volume and consistency possible. “I never would have maintained a six-day posting schedule if I was still editing on a laptop,” she told Food Blogger Pro in a December 2022 interview. Her story illustrates the core argument of this guide: flat lay photo editing mobile is not a compromise. For creators working at the pace modern social media demands, it is the superior system.
Your Action Plan
-
Download Lightroom Mobile and Snapseed today
Both apps are free to download. Install them, create an Adobe account (free tier is sufficient to start), and import three to five of your recent flat lay images. Spend thirty minutes exploring the interface without making permanent changes — just toggle sliders to understand their effect. This orientation session will pay dividends in every future editing session.
-
Calibrate your editing environment
Set your phone screen to maximum brightness before every editing session. Find a single spot in your home or workspace with consistent, moderate ambient light, and always edit there. This eliminates the most common cause of brightness inconsistency between sessions. Take a note of this location so you can return to it reliably.
-
Start shooting in RAW format
Enable RAW capture in your phone camera settings or a third-party camera app like Halide (iOS) or Open Camera (Android). RAW files give you 12-14 stops of dynamic range to work with in Lightroom Mobile, compared to JPEG’s 8-10 stops. The difference in highlight and shadow recovery is significant — especially for flat lays with both bright marble backgrounds and dark food elements in the same frame.
-
Build your base preset over five sessions
Over your next five shooting sessions, follow the core editing workflow outlined in this guide and note which specific slider values consistently produce the best results for your shooting environment. After five sessions, average those values and save them as your base preset in Lightroom Mobile. Resist the temptation to build the preset from a single session.
-
Master the Selective and Masking tools
In your next ten editing sessions, apply at least one selective adjustment per image — whether through Snapseed’s Selective tool or Lightroom Mobile’s Masking panel. Practice brightening the food subject independently of the background. This single skill upgrades your edits from global to targeted, and produces the professional-level separation between subject and background that characterizes high-engagement food imagery.
-
Set your export presets for each platform
In Lightroom Mobile, configure export presets for Instagram (1080 x 1350px, 95% JPEG, sRGB) and Pinterest (1000 x 1500px, 100% JPEG, sRGB). Save each as a named export preset so you never have to reconfigure settings per-platform. This step alone eliminates the compression and color-shift problems that affect bloggers who export without consistent settings.
-
Audit your editing time over 30 days
Track how long each editing session takes for thirty days. Note the date, image count, and total time. Most bloggers who implement this guide’s workflow see editing time cut by 40-60% within the first month. If you are not seeing improvement after thirty days, the bottleneck is likely the preset — return to step four and rebuild with more attention to your most-used color palette.
-
Review your analytics and adjust the aesthetic
After ninety days on the mobile workflow, pull your Instagram or Pinterest analytics and identify the ten highest-save posts. Examine what those images have in common aesthetically — brightness level, color temperature, color palette. Use those insights to refine your preset for the next quarter. Flat lay photo editing mobile is not a set-and-forget system; it evolves with your audience’s demonstrated preferences.
Frequently Asked Questions
Is mobile editing good enough for professional food photography clients?
Yes — with caveats. For social media deliverables (Instagram, Pinterest, blog imagery), mobile editing on a flagship smartphone shooting RAW is indistinguishable from desktop-edited output for most commercial clients. For print campaigns or billboard-scale advertising, desktop software and a professional camera setup remain preferable. The majority of food blogging sponsorships and brand collaborations fall into the social media category.
Do I need to shoot on a professional camera to get good flat lay results?
Not anymore. Flagship smartphones from 2021 onward (iPhone 12 Pro and newer, Samsung S21 Ultra and newer, Google Pixel 6 Pro and newer) produce flat lay images with sufficient resolution and dynamic range for professional social media use. The primary remaining advantage of dedicated cameras is interchangeable lenses — specifically wide-aperture primes — which can produce shallower depth of field effects. For flat lays shot overhead, this advantage is minimal since most flat lays are shot at f/8 or smaller equivalent anyway.
How long does it take to learn mobile flat lay editing?
Most creators reach functional competence — able to produce consistent, publishable results — in four to six weeks of daily practice. Reaching speed competence (editing a RAW file in under twelve minutes) typically takes two to three months. The learning curve is front-loaded: the first two weeks feel slow, then skills compound rapidly once muscle memory develops for the slider sequence.
What is the most important single edit I can make to improve my flat lays?
White balance correction. Inaccurate white balance affects every color in the image simultaneously and is the leading cause of “something looks wrong but I’m not sure what” in food photography. Set white balance first, using the eyedropper on a neutral surface, before touching any other slider. Fixing white balance alone elevates image quality more than any combination of secondary adjustments.
Should I use VSCO presets or build my own in Lightroom?
VSCO presets are an excellent starting point for developing aesthetic intuition, but they are designed for general photography, not food specifically. The green and fade effects that look great on lifestyle imagery often make food look sickly or unappetizing. Once you understand why a preset looks the way it does — which requires learning Lightroom’s individual controls — you will produce better results with a custom preset tailored to your specific food content and shooting environment.
Can I edit flat lays on an older iPhone or Android device?
Lightroom Mobile runs acceptably on devices as old as iPhone 8 (A11 chip) and Android equivalents with at least 4GB RAM. AI masking features require 2020 or newer devices for adequate speed. Snapseed runs on virtually any device released in the last eight years. If your device is older than iPhone 8 or the Android equivalent, the main limitation is RAW file processing speed — edits may take five to ten seconds to render, but the results are identical.
How do I maintain color consistency when shooting at different times of day?
This is the core challenge of natural-light flat lay photography. Three strategies help: shoot at the same time of day within a two-hour window consistently; always set white balance using the eyedropper rather than relying on Auto White Balance; and use a small physical reference card (an 18% gray card costs under $10) in the corner of the frame during test shots, then crop it before publishing. The gray card gives your editing software a mathematically accurate neutral reference point.
Is there a free alternative to Lightroom Mobile that covers all the features?
Snapseed covers approximately 70% of Lightroom Mobile’s core editing functionality for free, including selective adjustments, curves, HSL-equivalent controls, and a healing/clone tool. The gaps are: no cloud sync, no batch editing, no true Calibration panel, and no AI masking. For bloggers posting one to three times per week without batch-editing needs, Snapseed alone is a legitimate professional tool. For higher-volume creators, Lightroom Mobile’s paid tier at $9.99/month is worth the investment.
How do I avoid the muddy, over-processed look that a lot of food flat lays have?
The muddy look comes from two sources: excessive global Clarity or Texture boosts (which create an over-textured, almost HDR effect), and over-saturation. Keep global Clarity below +25 and Saturation below +20. Apply Texture selectively to the food subject only, not the entire image. The restraint rule applies: if you are unsure whether an adjustment is too strong, reduce it by 20% before exporting. You can always increase it in the next session once you see how the image reads on other screens.
What is the best way to handle editing for Instagram Reels vs. static posts?
For Reels using flat lay footage (stop-motion, overhead pour shots), consistency between frames is paramount. Lightroom Mobile’s video editing capabilities are improving but are not yet as robust as photo editing. For video content, CapCut’s color grading tools are a strong mobile alternative. Apply the same color grade values from your photo preset as closely as possible in CapCut’s filter and adjustment panels to maintain brand consistency across static and video content.
Creators interested in how technology is reshaping creative workflows more broadly may find it useful to explore how AI is transforming the way we discover content — trends that directly affect how food photography is surfaced and distributed online.
Sources
- Statista — Mobile App Store Consumer Spending 2023
- Later — Instagram Food Creator Workflow Study 2023
- Sprout Social — Instagram Engagement Statistics and Benchmarks
- Adobe — Lightroom Mobile Product Page and Feature Overview
- ScienceDirect — Food Quality and Preference Journal
- HubSpot — Social Media Content Performance Study 2022
- Instagram Help Center — Photo and Video Sharing Specifications
- Pinterest Business — Creative Best Practices and Image Format Guidelines
- Food Blogger Pro — Mobile Editing Workflows and Case Studies
- Digital Photography School — Food Photography Editing Techniques
- Google — Snapseed Support and Feature Documentation
- CreativeLive — Food Photography Lighting and Editing Tips
- Pinch of Yum — Food Photography Reader Survey and Tips
- Apple — iPhone 15 Pro Camera Specifications and RAW Capture
- Samsung — Galaxy S24 Ultra Camera and RAW Format Support