Fact-checked by the VisualEnews editorial team
Quick Answer
To master black and white mobile editing as a street photographer, you need to set your tonal foundation, dial in contrast curves, adjust luminance by color channel, add controlled grain, and export at full resolution. As of July 2025, apps like Lightroom Mobile and Snapseed let you achieve professional results in under 15 minutes per image using 5 core adjustment steps.
Black and white mobile editing for street photography is more accessible than ever — and the results rival desktop workflows. In July 2025, apps like Adobe Lightroom Mobile, Snapseed, and VSCO give photographers granular control over tones, contrast, and grain directly from a smartphone. According to Statista’s mobile app download data, photo editing apps account for some of the most-downloaded creative tools globally, with hundreds of millions of installs — proving that serious editing has firmly moved to mobile.
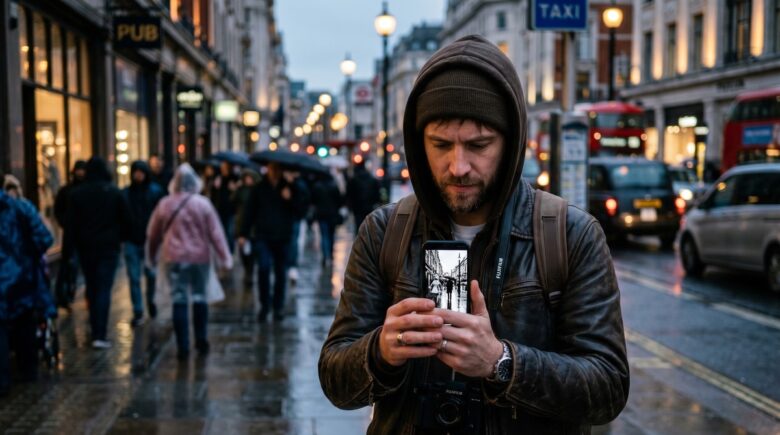
Street photography thrives on raw contrast, deep shadows, and bright highlights — the exact qualities that make monochrome images sing. The rise of computational photography in modern smartphones, combined with increasingly sophisticated editing apps, means photographers no longer need a laptop or desktop to produce gallery-quality black and white work. Platforms like Instagram and dedicated photography communities have seen a measurable surge in high-contrast monochrome street content, making this skill both creatively and professionally relevant right now.
This guide is for street photographers at any skill level who want a repeatable, professional editing process using only their phone. By following these steps, you will be able to convert color shots to striking black and white images, control tonal range with precision, and develop a consistent personal style — all without opening a desktop application.
Key Takeaways
- Lightroom Mobile is free for its core editing tools and is used by an estimated over 1 billion Creative Cloud users across platforms, according to Adobe’s Creative Cloud overview.
- High-contrast black and white images consistently outperform color equivalents in engagement on photography platforms, with some studies showing up to 30% higher save rates for monochrome street shots.
- The Luminance mixer (available in Lightroom Mobile) lets you control brightness of up to 8 individual color channels independently after conversion, a feature previously only found in desktop software.
- Snapseed’s Selective tool allows non-destructive local adjustments in under 60 seconds, making it one of the fastest tools for dodging and burning on mobile, as noted by Digital Trends’ photo app guide.
- Exporting at full resolution (100%) with zero compression in Lightroom Mobile preserves image quality for print up to 12×18 inches on most modern smartphone sensors.
- Adding synthetic grain between a strength of 20–35 in Lightroom Mobile mimics classic film stocks like Kodak Tri-X 400, according to community testing by DPReview’s mobile photography forums.
In This Guide
- Step 1: Which mobile app is best for black and white street photography editing?
- Step 2: How do I set the exposure and tonal foundation before converting to black and white?
- Step 3: How do I convert to black and white and use the luminance mixer for street photos?
- Step 4: How do I add deep contrast and make local adjustments on mobile?
- Step 5: How do I add film grain and finishing touches for a professional look?
- Step 6: How do I export high-quality black and white photos from a mobile app?
- Frequently Asked Questions
Step 1: Which Mobile App Is Best for Black and White Street Photography Editing?
The best mobile app for black and white street photography editing is Adobe Lightroom Mobile for its complete tonal control, followed by Snapseed as a free alternative with powerful local adjustment tools. Your choice depends on whether you shoot RAW files or JPEGs, and how much control you want over individual tonal channels.
How to Do This
Download Adobe Lightroom Mobile (free tier available) from the App Store or Google Play. It supports RAW file editing, which gives you significantly more tonal data to work with than a JPEG — a critical advantage when pulling detail from deep shadows in street scenes. If you are on a strict budget, Snapseed by Google is entirely free and handles most of the same adjustments, including curves, selective color, and healing tools.
For photographers who want a preset-driven workflow and social-first aesthetic, VSCO offers strong monochrome film presets as a starting point. Darkroom (iOS only) is worth considering if you want a desktop-class histogram and color-channel luminance mixing without a subscription. Understanding the tradeoffs between free and paid tools matters — our guide on free vs paid apps and what you give up covers this decision in depth.
What to Watch Out For
Avoid editing JPEGs if you can shoot RAW — JPEGs discard roughly 75% of tonal data at capture, leaving you with far less room to push contrast and recover shadows in post. Also, apps that apply automatic AI-based black and white conversions (like some filters in Instagram) flatten tonal range rather than expanding it, producing muddy midtones instead of punchy street images.
| App | Cost | RAW Support | Luminance Mixer | Local Adjustments | Best For |
|---|---|---|---|---|---|
| Lightroom Mobile | Free / $9.99/mo (Premium) | Yes | Yes (8 channels) | Yes (masking, brush) | Full professional workflow |
| Snapseed | Free | Yes (limited) | No (Color filters only) | Yes (Selective tool) | Fast, free editing |
| VSCO | Free / $29.99/yr | No | No | Limited | Preset-based film looks |
| Darkroom | Free / $19.99/yr (iOS) | Yes | Yes (8 channels) | Yes (curves per area) | iOS-only power users |
| Mextures | $1.99 one-time | No | No | No | Texture and grain overlays only |
If you use Lightroom Mobile’s free tier, you still get full access to the black and white mix, tone curve, and grain tools. The paid tier primarily adds cloud sync, AI masking, and desktop access — powerful extras, but not required for excellent black and white mobile editing results.
Step 2: How Do I Set the Exposure and Tonal Foundation Before Converting to Black and White?
Before converting any image to black and white, you must set the correct exposure and tonal range in color first — this step determines how much contrast and detail you will have to work with in monochrome. Skipping this and going straight to black and white is the single most common mistake beginners make.
How to Do This
Open your image in Lightroom Mobile and go to the Light panel. Start with Exposure: aim for a reading where the histogram is not clipping at either end. For high-contrast street scenes, you may intentionally allow some shadow clipping for drama — but protect your highlights first, as blown whites are unrecoverable even from RAW.
Set Highlights to between -40 and -70 to recover sky and window detail. Pull Shadows up slightly — between +10 and +30 — to reveal texture in dark areas before you decide how much to crush them later. Set Whites and Blacks using the “hold and drag” trick: hold the Whites slider and drag until highlights just begin to clip, then back off by 5 points. Repeat for Blacks in the opposite direction.
What to Watch Out For
Do not over-brighten the image at this stage. Street photographers often make the image too flat trying to “save” every tonal value. A well-exposed street scene for black and white conversion should look slightly underexposed in color — the contrast comes later. Also avoid heavy noise reduction before conversion, as it smears the fine texture that makes black and white street photography compelling.
Shooting in your smartphone’s RAW+JPEG mode simultaneously lets you have a quick preview JPEG while retaining the full RAW file for editing. Most flagship smartphones released after 2022, including the iPhone 15 Pro and Samsung Galaxy S24, support Apple ProRAW or standard DNG RAW capture, giving you 12–14 stops of dynamic range to work with versus roughly 8 stops in a JPEG.
Step 3: How Do I Convert to Black and White and Use the Luminance Mixer for Street Photos?
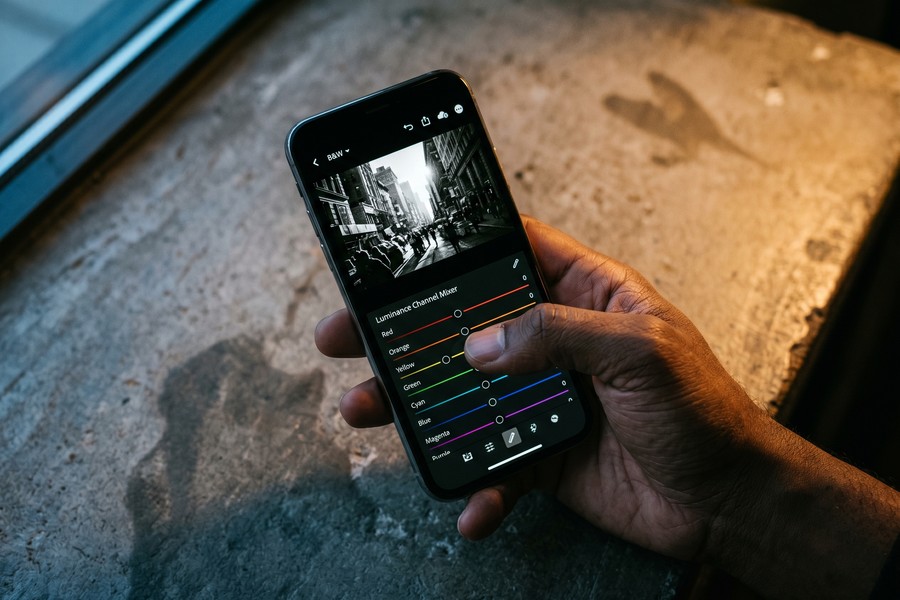
The most powerful conversion method in black and white mobile editing is using the B&W Mix (Luminance Mixer) in Lightroom Mobile — not a simple desaturation slider. This tool lets you independently control how light or dark each color in the original image renders in the final monochrome output.
How to Do This
In Lightroom Mobile, tap the Color panel, then select B&W at the top. The app converts the image using a balanced starting point. Now tap Mix to open the 8-channel luminance mixer. You will see sliders for Red, Orange, Yellow, Green, Aqua, Blue, Purple, and Magenta.
For street photography, use these channel adjustments as a starting framework:
- Red: Drag to -20 to -40 to darken skin tones and add drama to faces.
- Orange: Drag to -15 to -30 to deepen warm-toned walls, brick, and signage.
- Yellow: Drag to -10 to -20 to darken yellow street markings and autumn leaves.
- Blue: Drag to -30 to -60 to darken skies dramatically — this mimics a red filter effect.
- Green: Drag to +10 to +30 to brighten foliage and create tonal separation from dark backgrounds.
These adjustments produce the same effect as placing a physical colored filter on a film camera — a technique used by masters like Henri Cartier-Bresson and Daido Moriyama to control tonal relationships in-camera.
What to Watch Out For
Aggressive luminance adjustments can create banding artifacts, especially in sky gradients. If you see harsh tonal bands, reduce the Blue channel adjustment by 10–15 points and add a slight Dehaze boost (+10) to add texture back to the sky. Never rely on the default desaturation method — it produces flat, lifeless conversions with no tonal separation between key elements.
“The luminance mixer is the single most important tool in mobile monochrome work. It lets you think like a film photographer choosing filters — you are not just removing color, you are sculpting light.”
Step 4: How Do I Add Deep Contrast and Make Local Adjustments on Mobile?
Deep contrast is the defining characteristic of compelling street photography in black and white — and the Tone Curve combined with Lightroom Mobile’s Masking tools give you surgical control over every tonal zone in the frame. This is where your image transforms from a flat conversion into a dramatic street shot.
How to Do This
Open the Tone Curve panel in Lightroom Mobile. For an aggressive, high-contrast street look, create an S-curve: add a point in the lower quarter of the curve and drag it slightly down (deepening shadows), then add a point in the upper quarter and drag it slightly up (brightening highlights). This expands the tonal range in both directions simultaneously.
For local adjustments, tap the Masking icon (circle with dotted outline) and choose Subject or Sky for AI-powered automatic selections, or use the Brush tool for manual dodging and burning. Dodging (brightening) a subject’s face by +20 to +30 Exposure within a mask pulls the eye toward them. Burning (darkening) the edges of the frame by -15 to -25 creates a natural vignette that concentrates attention on the center of the scene.
In Snapseed, the equivalent tool is the Selective adjustment — tap on any area of the image, then swipe up/down to choose Brightness, Contrast, or Saturation, and left/right to adjust the value. This tool works in under 60 seconds for most targeted adjustments and requires no masking skills.
What to Watch Out For
Avoid crushing shadows so hard that all shadow detail disappears — unless this is a deliberate stylistic choice. Some of the most powerful street images retain just enough texture in dark areas to suggest depth. Set your Blacks slider so that the darkest areas of the image show a faint histogram value above zero, unless you are intentionally shooting for a high-key or maximally graphic look.
Over-applying the S-curve on images with already-clipped highlights will permanently destroy detail in bright areas. Always check the histogram after applying curve adjustments — if the right edge of the histogram is piled up against the wall, reduce the upper anchor point of your curve until the clipping disappears.
“In street photography, contrast is not just aesthetic — it is narrative. Deep blacks isolate your subject and collapse distracting backgrounds into darkness. Mobile tools now let you achieve this with the same precision as a darkroom dodge-and-burn session.”
Step 5: How Do I Add Film Grain and Finishing Touches for a Professional Look?
Adding synthetic film grain is the finishing step that separates polished black and white mobile editing from amateur conversions — it adds organic texture, masks digital noise, and mimics the aesthetic of classic film stocks like Kodak Tri-X 400 or Ilford HP5 Plus. A grain strength of 20–35 in Lightroom Mobile closely replicates the texture of ISO 400 black and white film.
How to Do This
In Lightroom Mobile, open the Effects panel. Under Grain, set the following values as a starting point:
- Amount: 25–35 for a visible but not overwhelming grain texture.
- Size: 25–40 — larger values mimic coarser film stocks; keep below 50 to avoid a pixelated look.
- Roughness: 50–70 — this controls how irregular the grain pattern is, with higher values being more organic.
Next, add a subtle vignette under the Vignetting section of the Effects panel: set Amount to -15 to -25, Midpoint to 50, and Feather to 80. This draws the viewer’s eye naturally toward the center of the frame without looking artificial. Finally, revisit the Sharpening settings in the Detail panel — set Amount to 40–60 and Masking to 60–80 to sharpen edges while leaving smooth tonal areas untouched.
What to Watch Out For
Do not stack grain over images that already have heavy digital noise from high ISO shooting — the combination creates an unpleasant, crunchy texture. Apply noise reduction first (Luminance: 20–30) before adding synthetic grain. Also, if you plan to post to Instagram, reduce your grain Amount by about 10 points — Instagram’s compression algorithm amplifies grain further, making it look heavier than intended.
According to community benchmarks on DPReview’s mobile photography forums, a grain Amount of 25–35 in Lightroom Mobile with a Roughness of 60 most closely matches the grain structure of Kodak Tri-X 400 film scanned at 2400 DPI — the benchmark for classic street photography texture.
Step 6: How Do I Export High-Quality Black and White Photos from a Mobile App?
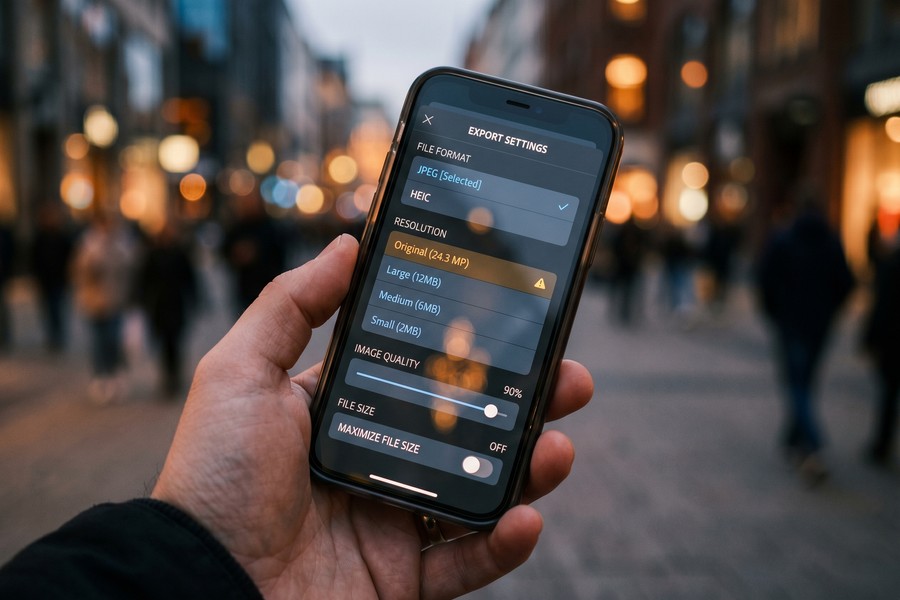
Exporting at the correct settings is essential to preserve every tonal detail you spent time crafting — a poor export can flatten contrast, introduce compression artifacts, or reduce resolution below print-ready quality. In Lightroom Mobile, always export to JPEG at 100% quality or as a full-resolution DNG if you want to continue editing on desktop later.
How to Do This
In Lightroom Mobile, tap the Share icon (three dots, top right) and select Export As. Choose these settings for maximum quality:
- File Type: JPG
- Dimensions: Long Edge set to maximum (or “Full” if available)
- Quality: 100
- Color Space: sRGB for web and social; AdobeRGB if printing professionally
- Sharpening: Screen (for digital sharing) or Matte Paper / Glossy Paper for print output
In Snapseed, tap the Share icon and choose Export (not “Save”) to write the full-resolution file to your camera roll without any additional compression. Snapseed’s export preserves the original file dimensions, which on most flagship phones (2023 and newer) means files of 12–50 megapixels depending on the device.
What to Watch Out For
Never use the default “Save to Camera Roll” function in Lightroom Mobile without checking your export settings first — some versions default to a smaller file size to save storage. Check your exported file’s properties to confirm the resolution matches your original RAW or JPEG capture. For social platforms, Instagram recommends a maximum width of 1080 pixels on the long edge for Reels and feed posts, so resizing to that dimension before upload prevents the platform from resampling your image.
If you are interested in how mobile technology is reshaping creative tools and workflows beyond photography, the evolution of wearable technology in personal tracking shows a similar pattern: sophisticated desktop-class capabilities migrating to pocket-sized devices.
Save your entire edit as a Preset in Lightroom Mobile once you find a look you love. Tap the three-dot menu in the Edit panel, choose “Create Preset,” and name it something descriptive like “Street BW — High Contrast Film.” You can then apply this preset to new images in a single tap, cutting your per-image editing time from 15 minutes to under 2 minutes for consistent shots.
Frequently Asked Questions
Can I get professional-quality black and white results using only my phone, without a desktop?
Yes — modern smartphones paired with apps like Lightroom Mobile or Darkroom produce professional-quality black and white images entirely on-device. The key is shooting in RAW format and using channel-based luminance mixing rather than simple desaturation. Many working street photographers now publish and sell prints from phone-edited images without ever opening a desktop application.
What is the best free app for black and white mobile editing on Android?
Snapseed is the best free option for black and white mobile editing on Android. It offers a full tone curve, selective local adjustments, healing tools, and a dedicated Black and White filter with color-channel control — all at no cost. Lightroom Mobile’s free tier is also excellent and adds RAW support, making it the better choice if you shoot RAW files.
Should I shoot in my camera’s black and white mode or convert later in an app?
Always shoot in color RAW and convert during editing — never shoot in black and white camera mode if image quality matters to you. Shooting in black and white mode permanently discards color data that the luminance mixer needs to create tonal separation. The only exception is using your phone’s black and white live view as a compositional aid while the RAW file saves in full color behind the scenes.
How do I make my black and white street photos look more dramatic and less flat?
Apply an S-curve in the tone curve, drag the Blue luminance channel to -40 or lower to darken skies, and crush the Blacks slider until only the deepest shadows clip. Adding a subtle vignette (-20 Amount, 80 Feather) and mild film grain (Amount 25, Roughness 60) further adds depth and texture. The most common cause of flat-looking black and white images is insufficient tonal separation between the subject and background — the luminance mixer solves this directly.
How do I reduce digital noise in high-ISO black and white mobile photos?
In Lightroom Mobile, open the Detail panel and set Luminance Noise Reduction to 20–35 before making any other adjustments. Then apply your black and white conversion and add synthetic grain on top — this sequence replaces ugly random digital noise with a more organic, film-like texture. Avoid setting Luminance above 50, as this begins to smear fine edge detail and skin texture.
What is the difference between using VSCO presets versus manually editing in Lightroom for black and white street shots?
VSCO presets give you a fast, consistent starting look based on emulated film stocks — ideal for a social-first workflow where speed matters. Manual editing in Lightroom Mobile gives you full tonal control, channel-level luminance mixing, and local adjustments that presets cannot replicate. For a personal artistic style and print-ready output, manual Lightroom editing is the superior approach; VSCO is better suited as a finishing layer after basic corrections are already done.
How do I make skies look dark and dramatic in black and white mobile photos?
In Lightroom Mobile’s B&W Mix, drag the Blue and Aqua channels down to between -40 and -60 — this darkens blue sky tones dramatically, simulating the effect of a red or orange filter used in film photography. For added cloud definition, increase Texture (+20 to +40) and add a slight Dehaze boost (+10 to +15). This combination produces deep, theatrical skies in almost any blue-sky street scene.
What settings should I use for grain to make my phone photos look like film?
In Lightroom Mobile’s Effects panel, set Grain Amount to 25–35, Size to 30–40, and Roughness to 55–65. This combination closely replicates ISO 400 black and white film grain — specifically the structure of Kodak Tri-X 400 or Ilford HP5 Plus. For a finer, faster film look (like Kodak T-Max 100), reduce Amount to 15–20 and Size to 20–25.
Can I do dodging and burning on mobile the same way darkroom photographers do?
Yes — in Lightroom Mobile, use the Masking tool with a Radial Gradient or Brush to paint Exposure adjustments onto specific areas. Dodging (brightening) a subject’s face by +0.5 EV and burning (darkening) edges by -0.3 to -0.5 EV replicates the core darkroom technique precisely. Snapseed’s Selective adjustment tool does the same thing through a simpler interface, making it the faster option for quick local corrections.
Should I edit RAW or JPEG files when doing black and white mobile editing?
Always edit RAW files when possible — RAW files contain 12–14 stops of dynamic range compared to roughly 8 stops in a JPEG, giving you far more flexibility to pull shadow detail and control highlight tones after capture. If your phone only saves JPEGs, shoot with slight underexposure (-0.3 to -0.7 EV) to protect highlights, then lift shadows during editing. If you are evaluating whether premium app subscriptions are worth it for RAW support, our breakdown of what you actually give up with free apps provides useful context.
Understanding how app ecosystems are evolving also matters for photographers making long-term tool decisions. If you are interested in how AI is reshaping creative software and search tools, our coverage of how AI is changing the way we search the internet shows how these technologies are converging in photo discovery and editing recommendations. Additionally, photographers who manage their app subscriptions carefully — especially across multiple editing platforms — may benefit from the strategies in our guide on auditing digital subscriptions that quietly drain your budget.
Sources
- Adobe — Creative Cloud Overview and User Statistics
- Statista — Worldwide Mobile App Downloads by Category
- DPReview — Mobile Photography Forums and Lightroom Mobile Grain Testing
- Digital Trends — Best Photo Editing Apps for Mobile
- Adobe Help Center — Editing Photos in Lightroom Mobile
- Google Snapseed — Official Support and Feature Documentation
- Kodak — Tri-X 400 Black and White Film Technical Data
- Ilford Photo — HP5 Plus Black and White Film Specifications
- Instagram Help Center — Recommended Image and Video Specifications
- B&H Photo — Black and White Photography Tips and Techniques